
Please bear with me as I find my blogging groove. My original plan when I began Simplicity In The South was to have two posts a week. I have found that {for now} one a week is more manageable so that I can keep my family happy, find time to do projects/tutorials, work a full-time job, and keep my sanity at the same time. I absolutely LOVE doing this blog gig on the side and want to express my appreciation to all of those that are following along! Believe me, behind the scenes, there is a whole lotta' work going on to keep this show on the road!
My mantra has been this...
 |
| Source |
In a prior post, I had shown you a collection of my favorite vintage sign tutorials.

The tutorial that I am sharing today uses some of the tips that I learned from that collection along with a little experimentation with some new tips that I found since that post.
To keep costs down, and to eliminate the mountain of scrap wood that has found a home on our family room floor {a.k.a. The Workshop}, I used two left over wooden v-groove planks from our teenage son's office-in-a-closet planked walls.
These planks come in 8 foot lengths and each one is 3.5 inches wide. I cut two of the planks in half, so the total size of the sign is 48" x 14". This sign could also be easily done on a piece of plywood instead.
Once I had the planks together, I flipped the sign over and added strips of lattice wood to the back to keep it together.

The sign was painted with one coat of Annie Sloan's Chalk Paint in Provence blue and then given a coat of white latex two hours later.
To age the finish, I found a great tip from Funky Junk Interiors. She uses masking tape to pull some of the paint off to give the finish a chippy appearance. This needs to be done before the paint has a chance to cure. I waited about an hour after I painted the latex on to use the tape. Since I didn't have any masking tape, I used Duct Tape, the 8th Wonder of the World.

This allows the Provence blue paint to show through. I followed that with some light sanding.

I had our oldest son make a Photoshop image of the lettering that was inspired by this photograph.
 |
| Charleston, SC |
The fonts I used are Retro Lined, Brush Script and Franchise. If you would like a copy of the sign image in Photoshop (PSD) format that can be printed out to 48" x 15", just drop me an email and I will email it to you. The office supply store charged $3.50 to print the image out as an engineer's print.
To transfer the image to the wood, rub a piece of colored chalk on sheet of paper. Lay this face down on the sign and place the image that you want to trace on top. After you trace the lettering with a ball point pen, the chalk lines can be drawn with a Sharpie marker.
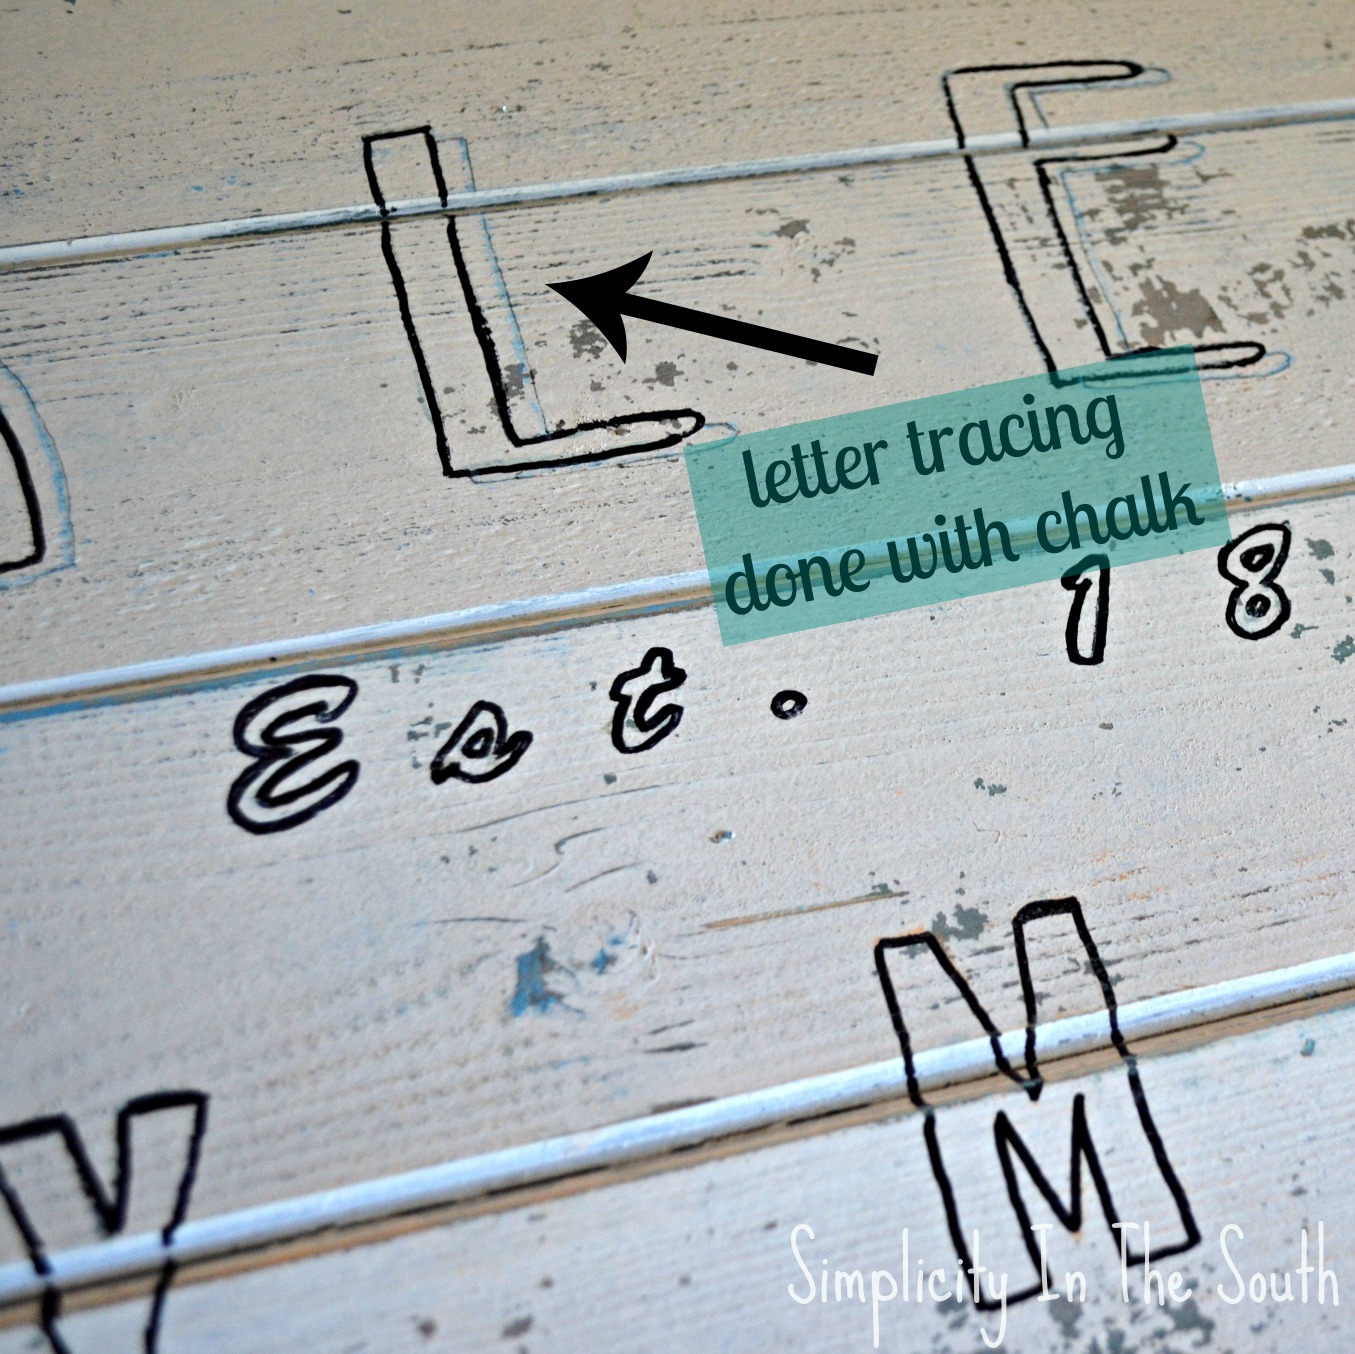
I did not outline my shadow with the marker since it would be painted blue instead of black. If you use the Retro Lined Font, the shadowing is done for you.
Once you have the lettering outlined, fill in with black craft paint. After the black paint dries, fill in your shadowing effect with a contrasting color. I used the same Annie Sloan Chalk Paint in Provence.

Allow your paint to dry for about 24 hours, then lightly sand to distress the lettering. Follow with a light whitewash.
For the whitewash, I diluted one tablespoon of white latex paint to 1/8 cup of water. I brushed it on and then wiped it off with a dry rag.

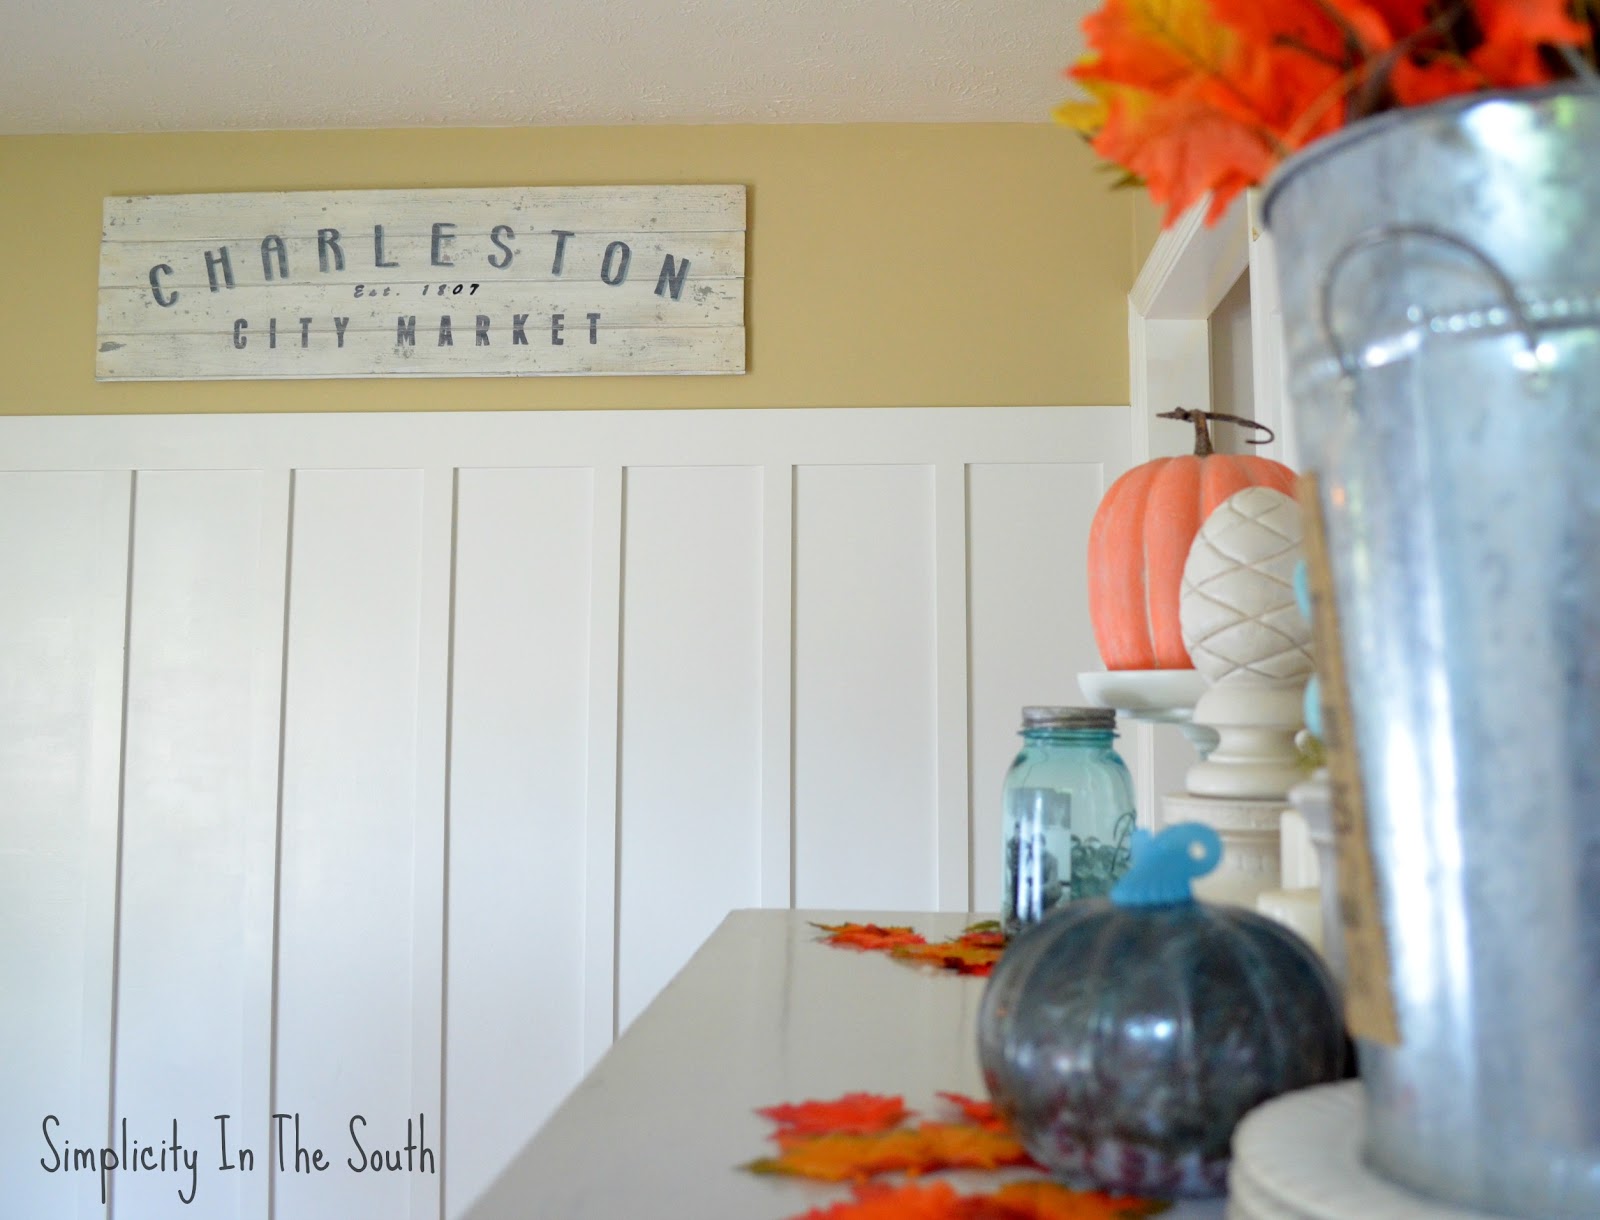
I have to admit. I love my sign almost as much as the city, itself. Fine southern shopping and hospitality at its' best. We will be spending our next summer vacation near there so I'd love to know which antique stores I need to scope out!

You may also like:

I'm linking this up to these fabulous blogs:
A Bowl Full Of Lemons
Common Ground
Tatertots and Jello
Funky Junk Interiors
Coastal Charm
Great tutorial! This is going to come in handy when we start decorating our kitchen/dining room.
ReplyDeleteThanks for sharing :)
I love it, thank you for the tips, I will be pinning:)! Always wanted to visit maybe someday!
ReplyDeleteGreat tutorial girl! I think next time we get together it should be to craft instead of eat...or we can eat AND craft :)
ReplyDeleteI wonder if it's possible to eat with one hand and craft with the other?! We need to get together again soon!
DeleteWow! I just stumbled upon your blog and have to say I am in awe! I can't believe you have just started it this year....I have been blogging off and on for a while, struggling along the way. So much actually goes into each post, sometimes its overwhelming. Hang in there...you are doing awesome! I subscribed :) BTW love the house!
ReplyDeleteThe sign looks amazing and great tutorial! I'm hearing you, blogging takes a whole lot of work and time, you just do what you can. BTW thank you so much for the paint tips for my kitchen...I just knew there would be someone else on the planet who could describe paint as blue/grey/taupe!! Now to find it! ;)
ReplyDeleteThis looks lovely, Tricia! I've been waiting patiently for your reveal and tutorial :) I think it's time to attempt a painted sign with shadowing.
ReplyDeleteI know exactly what you mean about having to cut back your blogging pace to maintain balance. I haven't blogged in almost a month because I just got a job teaching full-time for the rest of the year after almost a year of sporadic work. One day I'll have time to be creative for fun again!
All the best!
I have shopped that Market which makes me love your sign even more!
ReplyDeleteReally beautiful and great tutorial! I am with you on the working full time and blogging on the side. It is hard, but worth it!
ReplyDeleteYes! It is worth it!
DeleteTricia, your sign looks fab! It is hard to find your blogging grove, but looks like you're doing great! laurie
ReplyDeleteLove, love, love.. :)
ReplyDeleteThis comment has been removed by the author.
ReplyDeleteJust found your blog. Love your sign!! We used to live in SC and love Charleston and the Market too!! ( deleted because I did not spell check ;) )
ReplyDeleteI've been planning on trying my hand at making some signs, now with your great tutorial, I know I can...instead of I think I can! I'm a new follower!
ReplyDeleteTrish, I love the sign! Thanks for the awesome tutorial....going to give it a try! Question about photoshop- What version do you have? I've been thinking about it but there are several out there. It is expensive, and I noticed that you can subscribe to it?? Advice you could offer??
ReplyDeleteI don't see how you do it all and work full-time!! I don't work outside the home and really struggling getting into my blog groove as well!